Imagine spending thousands of dollars on gear, talent, and location permits, only to stand on set realizing you have no idea what to shoot next. It happens more often than you’d like to admit. The difference between a chaotic production and a polished music video isn’t just the camera lens-it’s the plan drawn on paper before the first frame is captured. Music video storyboarding is the process of translating musical ideas into a sequence of visual sketches that guide the entire production. It serves as the blueprint for your crew, ensuring everyone moves in sync with the song’s rhythm and emotion.
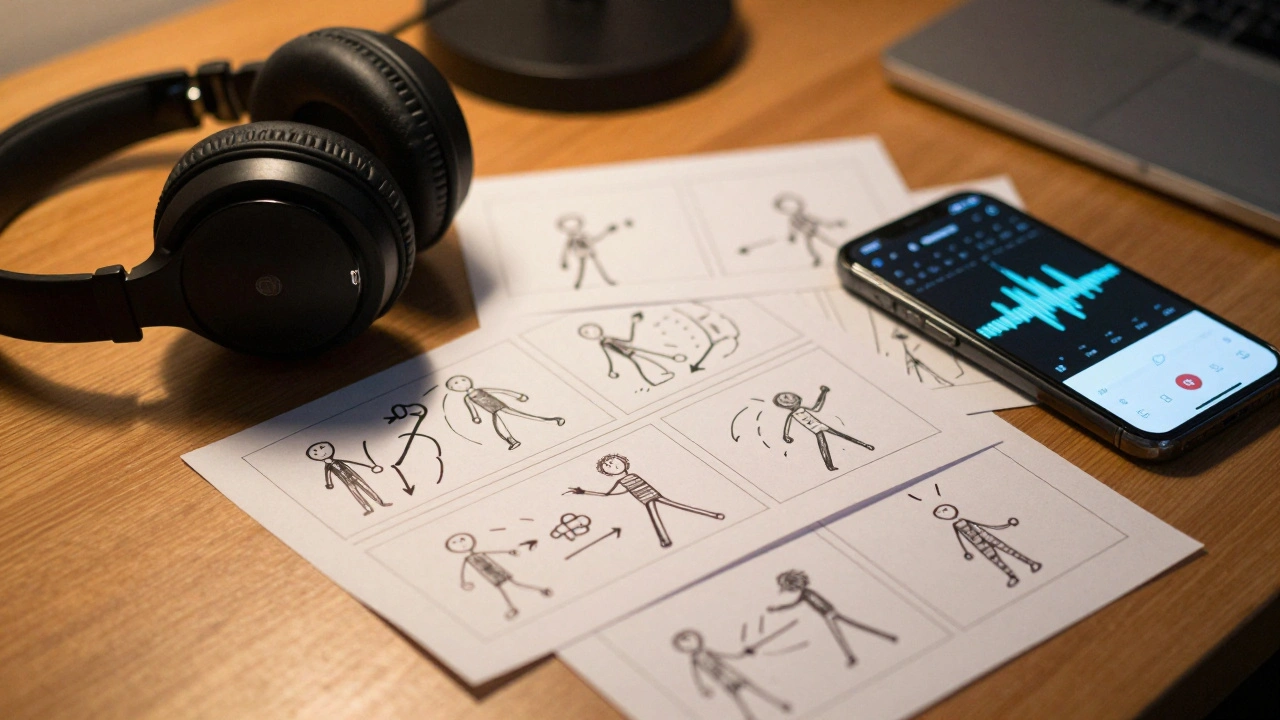
You don’t need to be a professional illustrator to create effective boards. In fact, stick figures work perfectly if they clearly communicate camera angles, movement, and timing. This guide will walk you through building a storyboard that saves time, reduces stress, and elevates the final product from amateur to professional.
Why Sketching Beats Improvisation
Many directors believe that spontaneity creates magic. While improvisation has its place, relying on it entirely during a music video shoot is risky. Music videos are tightly bound by time constraints-often shooting entire sequences in minutes to match specific beats or lyrics. Without a pre-visualized plan, you waste precious daylight or studio hours debating whether a wide shot or close-up fits better.
A storyboard acts as a shared language between the director, cinematographer, and producer. When you show a sketch of a low-angle tracking shot moving toward the artist, the camera operator knows exactly where to place the dolly or gimbal. The lighting team understands which side needs fill light. The editor gets a preview of the pacing. This alignment prevents costly reshoots and keeps the budget intact.
| Aspect | Without Storyboard | With Storyboard |
|---|---|---|
| Shoot Time | Unpredictable, often overruns | Efficient, stays on schedule |
| Budget Control | High risk of overtime costs | Predictable resource allocation |
| Creative Clarity | Fragmented vision | Unified narrative flow |
| Communication | Verbal confusion on set | Visual reference for all departments |
Deconstructing the Song for Visual Cues
Before drawing a single line, you must dissect the track. A music video isn’t just footage overlaid on audio; it’s a visual interpretation of sound. Listen to the song repeatedly, not just for enjoyment, but for structure. Identify the intro, verses, chorus, bridge, and outro. Each section demands a different visual energy.
Mark timestamps for key lyrical moments. If the singer mentions "rain" at 0:45, you need a visual cue there-whether it’s actual rain, a metaphorical splash, or a color grade shift to cool blues. Note the tempo changes. A slow ballad might benefit from long, static takes, while an upbeat pop track thrives on quick cuts and dynamic movement. Create a simple spreadsheet listing these timestamps alongside potential visual ideas. This document becomes the foundation of your storyboard.
Choosing Your Storyboard Format
The medium matters less than the message, but choosing the right tool can speed up your workflow. Traditional pen-and-paper methods remain popular because they force simplicity. You can sketch quickly without getting distracted by software menus. However, digital tools offer precision and ease of sharing.
- Hand-drawn sketches: Ideal for rapid ideation. Use index cards so you can rearrange scenes physically. Add arrows to indicate camera movement and notes for lighting.
- Digital illustration software: Programs like Adobe Illustrator or Procreate allow clean lines and easy edits. Great for teams who need high-resolution assets for presentations.
- Animatics: These are rough animations created by sequencing still images with temporary audio. They provide the most accurate preview of timing and pacing, though they require more technical skill.
- Photobooths: Using stock photos or test shots arranged in a grid. Useful when you lack drawing skills but need to convey composition clearly.
For most independent creators, a hybrid approach works best. Sketch initial concepts on paper, then digitize them for the final presentation. Ensure every panel includes three critical elements: the image itself, camera direction (e.g., pan left, zoom in), and duration (e.g., 3 seconds).
Key Elements Every Panel Must Include
A vague sketch leads to vague execution. To make your storyboard actionable, each panel needs specific details beyond just the subject matter. Think of each frame as a instruction manual for your crew.
Start with the composition. Is it a wide establishing shot showing the environment? Or a tight close-up capturing facial expressions? Indicate this with clear framing boxes. Next, define camera movement. Static shots feel grounded, while pans, tilts, and dollies add dynamism. Use standard notation: an arrow curving across the panel means a pan; a straight arrow pointing inward suggests a push-in.
Don’t forget action notes. What is the performer doing? Are they walking toward the camera, dancing, or interacting with props? Describe this briefly beneath the sketch. Finally, note any special effects or transitions. If you plan a whip pan or a dissolve, mark it clearly. This ensures the editor knows how to stitch the clips together later.
Integrating Lyrics and Rhythm
The strongest music videos sync visuals directly with the audio waveform. Your storyboard should reflect this synchronization. For rhythmic songs, consider cutting on the beat. Each drum hit could correspond to a new angle or movement. This creates a visceral connection between sight and sound.
For lyric-driven tracks, align imagery with specific words. If the line is "I’m falling apart," show fragmentation-shattered glass, breaking objects, or disjointed editing. This technique, called literal visualization, reinforces the message. However, avoid being too on-the-nose. Metaphorical interpretations often resonate deeper. Instead of showing tears for sadness, use shadows or muted colors to evoke the mood.
Test your timing early. Play the song while flipping through your storyboard pages. Does the pace feel right? Do the transitions land smoothly? Adjust panel durations until the visual flow matches the musical arc. This rehearsal step catches pacing errors before you commit to shooting.

Collaborating with Your Team
A storyboard isn’t a solo project; it’s a collaborative document. Share drafts with your cinematographer, producer, and even the artist. Their feedback can reveal logistical issues you missed. Maybe a proposed crane shot requires equipment you don’t have. Perhaps the artist feels uncomfortable with a certain pose. Addressing these concerns early prevents conflicts on set.
Hold a pre-production meeting where you walk through the storyboard scene by scene. Discuss feasibility, budget implications, and creative alternatives. Encourage open dialogue. Sometimes a simpler shot achieves the same emotional impact with half the effort. Flexibility during planning strengthens the final result.
Common Pitfalls to Avoid
New directors often fall into traps that undermine their planning efforts. One major mistake is overcomplicating scenes. Trying to capture too much action in one frame confuses the viewer and complicates filming. Stick to one primary focus per shot. Another error is ignoring continuity. Ensure clothing, props, and lighting remain consistent across sequential panels unless a change is intentional.
Also, resist the urge to storyboard every second. Some sections benefit from montage or abstract visuals that don’t require precise planning. Leave room for improvisation within structured boundaries. Mark these areas as "flexible" in your notes. This balance maintains control without stifling creativity.
From Paper to Screen: Execution Tips
Once filming begins, treat your storyboard as a living document. Conditions change-weather shifts, locations get crowded, actors improvise. Adapt accordingly, but keep the original plan accessible. Print copies for key crew members. Digital versions on tablets work well for quick reference.
Review completed shots against the storyboard daily. Did you capture the intended angle? Is the lighting matching the sketch? Early corrections prevent post-production headaches. Remember, the goal isn’t rigid adherence but faithful translation of your vision. If a spontaneous moment looks better than planned, take it-but document why, so the editor understands the choice.
Do I need artistic skills to create a music video storyboard?
No, artistic ability is not required. Clear communication is more important than aesthetic beauty. Simple stick figures with labeled arrows for camera movement and concise text descriptions effectively convey your vision to the crew.
How many frames should be in a typical music video storyboard?
There is no fixed number, but aim for one panel every 3-5 seconds of screen time. For a three-minute video, expect 36 to 60 panels. Focus on key moments rather than continuous coverage to save time and maintain clarity.
What software do professionals use for digital storyboards?
Popular options include Storyboarder by ShotGrid, Adobe Photoshop, and Final Draft Studio. Many directors also use simple PowerPoint slides or Keynote presentations for easy sharing and annotation during meetings.
Can I skip storyboarding for short-form content like TikTok reels?
While less critical for very short clips, basic planning still helps. Even a rough outline of shots ensures you capture necessary angles efficiently, reducing the need for multiple takes and saving battery life on mobile devices.
How do I handle unexpected changes during the shoot?
Keep your storyboard flexible. If conditions change, adapt the plan but document deviations. Communicate updates immediately to your team. Prioritize capturing essential shots first, then explore creative alternatives if time permits.